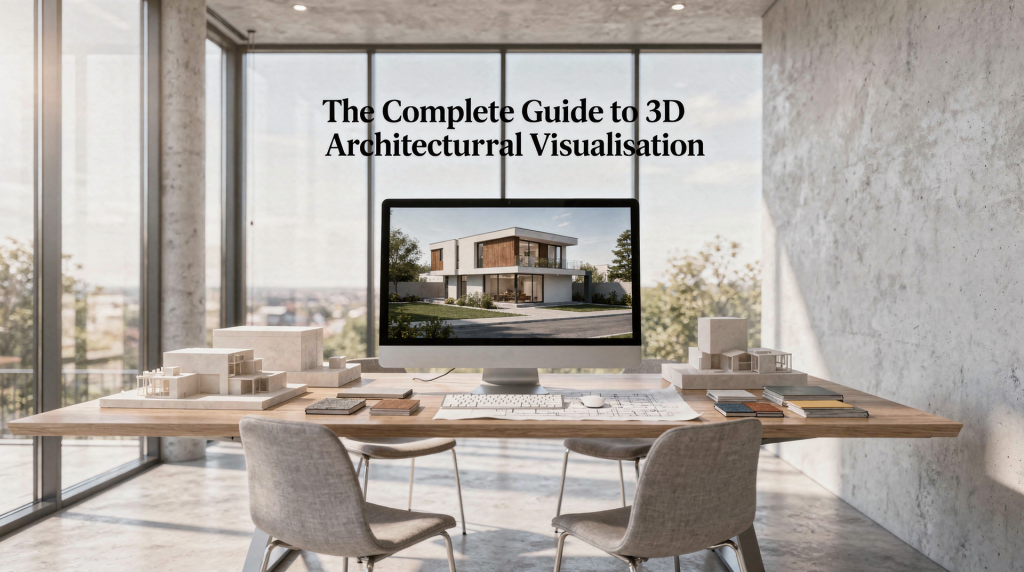
# The Complete Guide to 3D Architectural Visualization
3D architectural visualization turns drawings, plans, and ideas into images clients understand instantly — no guessing, no misinterpretation of a 2D line. When handled correctly, it lets architects, developers, and property marketers present a building before the foundation is poured, cut through miscommunication, and lock in design decisions faster.
## What 3D Architectural Visualization Actually Is
Architectural visualization is the craft of creating still images, animations, and interactive presentations of a building or interior while it still exists only on paper. In practice, you build a clean digital model, assign physically based materials, place and balance lighting, compose camera angles with intent, and render frames that feel like photographs of a finished space.
It runs across the entire property pipeline:
– Concept presentations for clients and investors
– Planning and design reviews
– Pre-sale and off-plan marketing
– Interior design approval
– Competition boards and portfolio work
– Construction and renovation communication
The core idea: the image isn’t decoration. It’s a decision-making tool. You’re not making pretty pictures; you’re answering questions the plans can’t.
## Why 3D Visualization Matters
A well-crafted render does three jobs at once:
– Shows scale and proportion more clearly than any set of drawings
– Communicates atmosphere, material tactility, and natural light behavior
– Flags problems before expensive on-site changes become the only fix
In real estate, this carries even more weight. Buyers don’t react emotionally to a floor plan — they react to a believable corner of a living room, a convincing facade catching late-afternoon light, or the view from a balcony. That’s why architectural visualization has shifted from a nice extra to a core marketing asset. You’re selling an experience, not a footprint.
## The Main Types of Architectural Visualization
| Type | What it shows | Best use |
|—|—|—|
| Exterior render | Building form, facade, context, landscaping | Development approvals, marketing, presentation decks |
| Interior render | Rooms, materials, furniture, lighting | Design approval, property sales, fit-out planning |
| Aerial / masterplan view | Site, massing, context, surroundings | Large developments, planning, masterplan storytelling |
| Walkthrough / animation | Spatial flow and sequence | Launch campaigns, investor presentations, websites |
| Real-time visualization | Interactive exploration and quick iteration | Design reviews, fast client feedback, presentation demos |
If the goal is to sell a unit, interiors and exteriors carry the most emotional weight. If the goal is to explain how a project sits in its context, aerials and masterplan views become the priority. Knowing which type the brief actually needs is half the battle.
## The Standard Workflow, Step by Step
Most projects follow the same production chain: input data, 3D model, materials, lighting, render, and post-production. Quality isn’t about skipping steps — it’s about how deliberately each stage is handled.
### 1. Gather the right input
Start with the strongest source material you can get:
– Floor plans
– Elevations
– Sections
– Site plans
– CAD, BIM, or SketchUp models
– Material references
– Furniture references
– Mood boards
– Site photos
Bad input creates avoidable revisions later. Missing dimensions, vague finish descriptions, or a camera brief that says “make it look nice” costs more time than rendering itself. Always push for concrete references early — a few well-chosen images from the client save days of guesswork.
### 2. Clean and prepare the model
Architectural models often come from construction-oriented files. They’re dimensionally accurate but rarely ready for visual production. Before a single light is placed, the scene needs a solid cleanup:
– Strip hidden construction layers and irrelevant linework
– Fix overlapping meshes that will cause artifacts in reflections
– Correct inverted normals — they’ll break every material
– Simplify geometry that never appears on camera
– Standardize units and logical naming conventions
– Rebuild messy components when auto-conversions fail
This stage isn’t glamorous, but it saves the project from death by a thousand micro-fixes later.
### 3. Add materials with real-world logic
Materials need to feel believable at the scale they’d occupy in physical space. Modern best practice leans on physically based (PBR) materials with correct texture scale, subtle roughness variation, and surface response that behaves predictably under lighting.
A few rules that hold up across every project:
– Wood grain scale should match the furniture or flooring dimension, not default to 1m² tiles
– Stone and tile patterns need controlled randomization to avoid obvious tiling
– Glossy surfaces demand properly directed reflections — a polished floor without a subtle roughness map looks like a mirror, not a floor
– Fabric should read visually softer than polished finishes through normal and roughness interplay
– Micro-imperfections — a fingerprint map on a tap, a slight edge-wear on a handle — ground the scene
The goal isn’t “detail everywhere.” It’s materials that react to light the way they would on site.
### 4. Set lighting before chasing perfection
Lighting is one of the biggest quality markers in archviz. For exteriors, rely on physically accurate sun and sky systems or high-quality HDRI setups that match the location and time of day. Interiors demand a careful balance of window light, practical fixtures, and subtle fill so the space breathes instead of feeling flat.
Habits worth building:
– Test the scene at morning, noon, and evening — the difference in mood is enormous
– Check shadow softness and direction; sharp noon shadows aren’t always the answer
– Avoid overexposed windows unless the artistic direction demands it
– Keep interior lighting warmer where appropriate — cold LED-white can kill the sense of home
– Use accent light to guide the eye, not to disguise weak modeling
Think of lighting as the narrative layer of the image. It decides where the viewer looks first.
### 5. Choose the right camera angle
Camera placement decides whether an image reads as intentional or amateurish. Wide establishing shots are valuable because they show how the building relates to its surroundings — they give the project context beyond the plot boundary.
For interiors:
– Keep verticals straight — converging lines scream snapshot
– Avoid unnatural ultra-wide distortion unless the creative brief allows it
– Show circulation and function; a living room should read as pass-through, not a dead-end
– Frame the space so depth is obvious; layer foreground, midground, background
For exteriors:
– Show the entrance clearly — it’s the building’s handshake
– Include landscaping and neighboring context when it adds meaning
– Balance the architecture with its environment; don’t isolate the building in a vacuum
### 6. Render, then refine
Rendering converts the scene into pixels, but the first output is rarely the final deliverable. Post-production should stay subtle and corrective, not cosmetic:
– Adjust contrast and color balance, ideally through a proper LUT or ACES workflow
– Refine sky integration so it matches the lighting angle and color temperature
– Control bloom and glare with intention, not as a default filter
– Add light haze or atmosphere only if it supports the sense of scale and realism
– Keep material consistency with the raw render pass; don’t repaint reflections in Photoshop
If post-production starts fixing major scene problems — lighting contrast that should have been in the 3D setup, materials that don’t read correctly — the project wasn’t ready to render.
## Interior vs Exterior Visualization
| Aspect | Interior visualization | Exterior visualization |
|—|—|—|
| Main focus | Atmosphere, function, materials, lighting | Form, facade, context, landscape |
| Common mistakes | Flat lighting, wrong furniture scale, clutter without hierarchy | Poor site integration, weak directional shadows, unrealistic planting |
| Key success factor | Human-scale realism | Strong composition and believable environment |
| Best reference material | FF&E lists, finishes, lifestyle images | Site photos, massing studies, surrounding buildings |
| Typical buyer question | “Would I enjoy living here?” | “Does this development fit the site and look credible?” |
Interiors are emotional and tactile — they sell the feeling of home. Exteriors are contextual and architectural — they sell the building’s relationship to the world. The best artists understand the difference and don’t light, dress, or compose them identically.
## What Makes a Render Look Real
Photorealism isn’t about making every surface tack-sharp. It’s about consistency: every element in the scene behaves as if governed by the same physical rules.
### The realism checklist
– Correct scale relationships between objects
– Materials that respond to light with proper reflection, refraction, and roughness
– Shadows that match the light source in softness, direction, and color
– Props that belong to the property type — don’t fill a minimal loft with ornate Victorian chandeliers
– Windows that both reflect and transmit light believably
– Color grading that enhances mood without crushing detail
– A sense of lived-in order, not showroom sterility
A room can be technically accurate and still feel dead. Real spaces often carry slight asymmetry, gentle imperfections, and small storytelling details — a book left open, a throw draped unevenly — that make the image breathe.
## Common Mistakes to Avoid
– Using the same camera height for every project, regardless of ceiling height or viewpoint intent
– Overusing dramatic lighting that hides weak modeling
– Adding too many props without a clear focal point; the eye has nowhere to rest
– Ignoring site context in exteriors — a building floating on a generic floor plane never convinces
– Leaving materials at default texture scale; every surface must be checked against real-world dimensions
– Modeling construction detail that never appears in frame, wasting time and render resources
– Relying on post-production to fix composition problems that should have been solved with the camera
– Presenting interiors with no sense of use or human scale — add a chair, a coffee cup, something that implies life
Most weak archviz comes from one of two sources: poor planning or poor restraint. Both are process problems, not talent gaps.
## Software and Tooling: What Actually Matters
There is no single required software stack. What matters is a clean pipeline from source files to final image, with minimal data loss between applications.
Typical production setups include:
– Modeling tools such as SketchUp, Revit, Rhino, or 3ds Max — each has its own import quirks you’ll need to manage
– Rendering engines for photoreal output (CPU/GPU hybrid engines now being the norm)
– Real-time tools for quick previews and interactive design reviews
– Asset libraries for furniture, plants, and entourage that are properly optimized for your renderer
Pick tools based on project needs, not industry hype. For fast client feedback, real-time workflows save days. For final hero images, a detailed photoreal pipeline is often worth the extra time because it handles light transport and material nuance more faithfully.
## How to Build a Strong Architectural Visualization Brief
A clear brief prevents most revision cycles. The best briefs typically include:
– Project type and target audience
– Required image count and aspect ratios
– Exact rooms, elevations, or angles to show — camera sketches or marked-up plans are gold
– Style references and mood references, with a note on what specifically the client likes about each
– Material schedule or finish list, down to the brand if possible
– Time of day and season preferences — golden hour in summer versus overcast autumn carry different marketing tones
– Deadline and review milestones
– Usage rights and output resolution
If the brief is weak, clarify it before the first polygon is modeled. It’s much cheaper to align intent early than to rework a finished scene because assumptions didn’t match.
## Quality Control Before Delivery
Use this final checklist before sending work to a client:
– Are all dimensions believable at a glance?
– Do materials match the approved specification?
– Are shadows and reflections physically plausible?
– Are key design features visible and well-framed?
– Does the image answer the brief directly?
– Are there distracting artifacts, seams, or repetitive patterns?
– Does the composition feel intentional, not accidental?
– Is the atmosphere appropriate for the audience — aspirational but grounded?
A final review should test both visual quality and communication value. If the image doesn’t support the decision the client needs to make, it’s not finished.
## Trends Shaping Architectural Visualization
The field is moving toward faster iteration, more interactivity, and visuals that plug into a larger marketing strategy. Clients increasingly expect renders to do more than sit pretty on a brochure — they need to help sell, explain, and differentiate a project in a crowded market.
Current direction points to:
– More real-time previews baked into design meetings
– More walkthrough-style presentations replacing static slides
– Stronger narrative in still images — every shot tells a micro-story
– More emphasis on context and emotional realism instead of sterile perfection
– Faster revision cycles between artist and client, enabled by GPU rendering and cloud-based review
This means artists who understand both design communication and production efficiency gain an edge. You’re not just a pixel maker — you’re a visual problem solver.
## Practical Advice for New Artists
Don’t start with a complex tower, a glossy luxury kitchen, and a night-time hero shot all at once. Start smaller and build confidence in the fundamentals.
A good first project:
– One room
– Simple daylight setup via an HDRI or sun/sky system
– Five or six carefully scaled PBR materials
– Basic furniture with correct proportions
– One strong, intentional camera angle
Build skill in this order:
1. Clean model
2. Correct scale
3. Basic lighting
4. Material accuracy
5. Composition
6. Polish and subtle post effects
That sequence is faster and more sustainable than trying to make the render “cinematic” from day one. Get the foundation solid; the mood follows naturally.
## Final Thoughts
3D architectural visualization is the craft of making unbuilt space understandable, believable, and persuasive. The strongest work comes from clean input, disciplined modeling, realistic materials, thoughtful lighting, and camera choices that serve the design rather than distract from it.
If the image helps someone make a decision — buy, approve, revise — it’s doing its job. If it only looks impressive for a second before the viewer moves on, it’s not there yet.
## FAQ
### What is the difference between architectural visualization and rendering?
Architectural visualization is the entire process of communicating a design through imagery — from gathering references to final output. Rendering is just one technical step inside that process: the calculation of light and materials to produce the image. Confusing the two is like calling framing “the whole house.”
### How long does a 3D architectural visualization project take?
Timelines depend on scope, revision rounds, and scene complexity. A simple one-room interior with a pre-built asset library might be wrapped in a few days. Large exterior hero shots, animations, or complete marketing sets naturally take longer because they demand more planning, more client approvals, and more refinement cycles.
### What files are needed to start a project?
Floor plans, elevations, sections, site plans, reference images, and any available CAD or BIM files form the essential starting package. The more dimensional data and material references you have upfront, the fewer guesswork-driven revisions later.
### Why do some renders look fake?
Common culprits: incorrect scale (furniture too small, tiles too large), harsh or flat lighting without direction, materials that don’t respond realistically to light, visible texture repetition, and overly perfect styling with zero wear or life. The render isn’t a lie — it just lacks physical consistency.
### Is real-time rendering good enough for final results?
Real-time tools are excellent for previews, client feedback, and production workflows that prioritize speed. For high-end photoreal stills aimed at premium marketing, many projects still benefit from a more detailed offline rendering pipeline that handles nuanced light transport and material behavior better. The right answer depends on the project’s finish level and audience expectations.