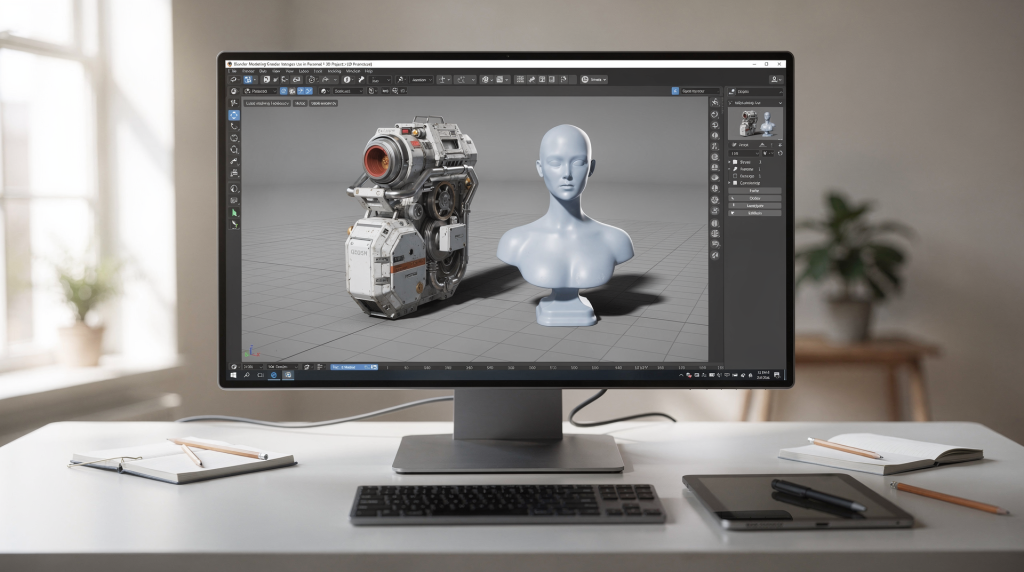
Over the years, I’ve narrowed my modeling toolkit in Blender to a handful of techniques that keep personal projects moving without sacrificing quality. The goal isn’t to master every modifier or add-on — it’s to match the method to the object’s role in the scene, the camera distance, and the level of realism the render demands. In architectural visualization, that discipline becomes even more critical: a hero chair in a close-up interior needs a completely different treatment than a background bookshelf, and forcing the same workflow on both just wastes time and GPU resources.
What follows are the habits and decision-making patterns I return to again and again, whether I’m building a full apartment interior, a set of bespoke furniture, or an exterior facade. They’re not flashy, but they’re dependable — and they keep the mesh readable, editable, and render-ready.
Why a practical modeling workflow matters
Personal projects have a way of spiraling into endless refinement. Without a clear sequence, you can spend hours tweaking a detail that the camera will never see, or worse, lock in proportions that later feel off when you drop a simple HDRI into the scene. A practical workflow prevents that drift by enforcing a clear order: blockout first, structure second, detail last. In archviz, this is doubly important because scenes are often built from dozens of assets that need to feel cohesive under consistent lighting. If you start detailing a kitchen cabinet before the room’s scale is locked, you’ll end up reworking it when the island moves or the ceiling height changes.
In practice, layering the work means:
- starting with simple primitives to nail the overall mass,
- locking proportions early against reference and camera angles,
- keeping major design decisions reversible,
- adding fine details only after the silhouette reads correctly from the key views.
That sounds elementary, but it’s the difference between a model that can survive client revisions (or your own second thoughts) and one that collapses into a messy, uneditable heap.
My core modeling mindset
I treat modeling as a chain of decisions, not a single uninterrupted pass. The central question is always: what level of detail does this object actually need for the final render? A background cabinet seen through a doorway doesn’t deserve the same attention as a hero asset in the foreground. A window frame in an exterior shot can often be sold with well-placed bevels and clean shading — no need for sculpt-level micro-details. For personal work, this mindset keeps scenes efficient, render times manageable, and the overall image cleaner because you’re not fighting unnecessary geometry in the viewport or during lighting adjustments.
The four questions I ask before modeling anything
Before I even add a cube, I run through a quick mental checklist that steers the entire workflow:
- Is the object organic or hard-surface? (Archviz is mostly hard-surface, but upholstery and drapery blur the line.)
- Will it be seen close up or only in the background? This dictates topology density and bevel fidelity.
- Does it need to stay editable later? If yes, non-destructive modifiers stay alive as long as possible.
- Can modifiers do the job better than manual geometry? Arrays, mirrors, and booleans often outperform hand-modeling for repetitive architectural details.
The answers usually dictate whether I’ll lean on subdivision surfaces, boolean cutouts, or simple box modeling with bevels — and they save me from overbuilding assets that the camera will barely register.
1. Block out with simple primitives
The first stage is always blockout. I throw in cubes, cylinders, planes, and a few scaled shapes to establish proportion and spatial relationships before touching any fine detail. In an interior scene, this means roughing out the room volume, major furniture pieces, and openings — all as unadorned masses. It’s the fastest way to catch scale mistakes. If a sofa is too deep or a dining table sits too low relative to the camera, fixing it in blockout takes seconds. Fixing it after bevels, edge loops, and UVs have been laid down can unravel hours of work.
What I focus on during blockout
- Overall proportions against reference images or real-world dimensions.
- Object relationships — how pieces sit next to each other and within the space.
- Silhouette from the main camera angles; I often set up a few rough cameras early.
- Scale consistency across the scene, especially when mixing imported assets.
Common mistake
Jumping straight into bevels and edge loops before the shape is right. The result is a polished object with fundamentally broken proportions — and it still looks wrong, no matter how nice the edges catch the light.
2. Use non-destructive modeling whenever possible
For personal projects, flexibility is king. I keep my models editable for as long as I can by leaning heavily on modifiers instead of applying everything immediately. The stack often includes Mirror, Subdivision Surface, Bevel, Array, and Boolean — all working together to let me explore forms quickly and reverse decisions without rebuilding from scratch. In archviz, this is a lifesaver when a client or your own eye decides a cabinet needs to be 10 cm wider or a window opening needs to shift. Adjust a parameter, and the whole model updates cleanly.
Why non-destructive modeling helps
- Changes remain easy — no need to manually move dozens of vertices.
- Variations are faster to test; you can duplicate an object, tweak a modifier, and compare.
- Symmetry is handled cleanly, which is essential for furniture and architectural elements.
- Repetitive elements like wall panels, slats, or mullions can be generated via Array instead of modeled one by one.
Typical example
For a wall panel or a cabinet door, I start with one clean base mesh, mirror it if the design is symmetrical, and use Bevel modifiers to control edge softness. Only after the form is stable and approved by a few test renders do I consider applying the stack — and even then, I often keep a backup with modifiers intact.
3. Build hard-surface objects with bevels, not fake sharpness
A common beginner instinct is to leave edges mathematically sharp, thinking that will read as crisp. In reality, perfectly sharp edges don’t exist — and they don’t render believably. Light catches the slightest rounding, and that tiny highlight is what communicates material and quality. In archviz, bevels are not just a finishing touch; they’re a fundamental part of the shading story. A wide, soft bevel on a painted wooden shelf reads completely differently from a tight micro-bevel on a stainless steel appliance edge. Getting that right is what separates a model that looks like a video game asset from one that feels like it belongs in a photograph.
Bevel habits that improve results
- Keep bevel widths consistent within the same material family — all painted wood edges should share a similar softness.
- Use a smaller bevel for technical, machined objects and a slightly softer one for furniture and architectural moldings.
- Always check how highlights behave under your main lighting setup; a quick test with an HDRI reveals if the bevel is too sharp or too wide.
- Avoid overly large bevels unless the object is intentionally soft-edged, like a rounded countertop or a plush upholstered form.
Why this matters
A model can have excellent proportions and still feel fake if the edges are too perfect. Real-world objects always have some degree of rounding — even a glass tabletop has a subtle eased edge. Ignoring that is one of the fastest ways to break immersion in an interior render.
4. Use booleans for cuts, then clean up intelligently
Booleans are incredibly useful for architectural details: window openings, recessed panels, ventilation slots, cable channels, and any situation where subtracting a shape is faster than building the geometry manually. I use them liberally during the blockout and refinement stages, especially for exteriors where facades need clean cutouts for windows and doors. But booleans are not a one-click solution. They almost always leave behind shading artifacts, n-gons, or broken normals that need attention — particularly if the object will be subdivided or viewed up close.
Best use cases for booleans
- Window and door openings in walls.
- Recessed panels on cabinet fronts.
- Cable channels and technical cutouts.
- Vents, slots, and repeating perforations.
- Any mechanical or architectural subtraction that would be tedious to model by hand.
What I check after boolean operations
- Shading artifacts — look for odd dark spots or pinching under a matcap or simple studio light.
- Strange n-gons in visible areas; I’ll often add a few supporting edge loops to guide the shading.
- Broken normals — a quick “Recalculate Outside” often fixes flipped faces.
- Whether the cut actually improves the silhouette or just adds visual noise.
Rule of thumb
Use booleans for speed, then simplify the visible surface so the object still shades cleanly. If the cut won’t be seen up close, you can often get away with minimal cleanup; if it’s a hero element, expect to spend a few minutes tidying up the topology around the cut.
5. Keep topology clean where it matters
Not every model needs perfect topology everywhere. That’s one of the most liberating lessons I’ve learned in Blender — and it’s especially true in archviz, where many surfaces are flat, static, and never deform. If a wall is flat and the camera won’t get close, the topology can be as simple as a single n-gon plane. If a curved chair arm will be subdivided and seen in a close-up, then edge flow becomes critical.
I care most about topology in these cases
- Curved surfaces that need to catch light smoothly.
- Any object in a subdivision workflow.
- Hero assets that will be scrutinized in the final render.
- Areas with complex shading, like bevel intersections or boolean cutouts.
- Anything that needs to remain easy to edit later.
I care less when
- The object is background-only and will be out of focus or small in frame.
- The surface is flat and hidden from the camera.
- The piece is a temporary blockout that will be replaced or refined later.
- The geometry will never be edited again and shades acceptably.
Typical beginner error
Spending hours making every object “perfect” on the inside, with immaculate all-quad topology, even when the camera will never see it. That’s wasted effort that could go into lighting, composition, or material refinement.
6. Model with the final camera in mind
Personal projects become dramatically easier when you know how the object will be viewed. In archviz, you’re usually working with a set of hero cameras — the wide living room shot, the close-up of the kitchen island, the exterior twilight view. I build assets according to their visibility in those specific frames. A hero chair in the foreground gets full attention: clean topology, controlled bevels, maybe even subtle fabric folds. A supporting prop on a shelf gets a clean silhouette but limited internal detail. Background objects through a doorway stay light and efficient, often just box-modeled with a bevel modifier and a good material. This tiered approach keeps the scene responsive and render times under control, without sacrificing the final image quality.
A simple visibility tier system
| Asset type | Modeling priority | Best approach |
|---|---|---|
| Hero object | Very high | Full cleanup, bevel control, polished shading, maybe even subtle imperfections |
| Supporting prop | Medium | Clean silhouette, limited internal detail, efficient use of bevels |
| Background object | Low | Simple geometry, efficient shading, no unnecessary edge loops |
| Hidden geometry | Very low | Keep it minimal — delete faces the camera will never see |
7. Use symmetry early, then break it when needed
Mirror workflows save an enormous amount of time, and in archviz, symmetry is everywhere: chairs, cabinets, appliances, table legs, mechanical fixtures. I almost always start with a Mirror modifier to keep the design readable and to make it easy to compare both sides during blockout. But perfect symmetry can also make a model feel sterile — especially in interior scenes where a lived-in, believable atmosphere is the goal. Once the main structure is locked, I often introduce small asymmetries: a slightly rotated cushion, a book leaning differently, a subtle shift in a panel gap, or even a variation in material wear. These tiny breaks in symmetry signal that the space is real, not a clinical 3D mockup.
Good uses for symmetry
- Chairs and sofas (base structure).
- Cabinet fronts and drawer layouts.
- Appliances and plumbing fixtures.
- Table legs and structural supports.
- Repetitive architectural elements like columns or mullions.
When to break symmetry
- Natural wear patterns — scuffs, scratches, uneven gloss.
- Personal props like books, plants, or decorative objects.
- Upholstered furniture where fabric tension isn’t perfectly even.
- Real-world architectural details that often have slight irregularities.
- Any object that should feel hand-made, used, or casually placed.
8. Separate primary, secondary, and tertiary forms
A clean model is built in layers, and I find this hierarchy especially useful in architectural visualization. Primary forms establish the overall mass and proportions — the big box of a building or the main volume of a sofa. Secondary forms define the structure: window recesses, panel divisions, armrests, frames. Tertiary details add realism: screws, seams, grooves, subtle undulations, edge wear. This layered approach prevents detail from creeping in too early and keeps the object readable from a distance. If the primary form is wrong, no amount of tertiary detail will save it — a lesson I’ve learned the hard way more than once.
What each layer means in practice
- Primary forms: overall mass, proportions, main silhouette — the big read.
- Secondary forms: panels, recesses, frames, supports, major cutouts that break up the surface.
- Tertiary details: screws, seams, grooves, tiny bevel variations, surface imperfections that catch light up close.
9. Know when to use manual modeling and when to switch methods
I don’t force every object into the same workflow. Some shapes are born for box modeling; others demand a more procedural or boolean-heavy approach. The best technique is the one that gets the result with the least cleanup and the most flexibility. In archviz, I often mix methods within a single asset: box modeling for the main cabinet body, an Array for the slatted front, a Boolean for a recessed handle, and a Bevel modifier to tie it all together visually. The key is to recognize which method suits the geometry at hand without getting religious about any single approach.
My general approach
- Box modeling for structured hard-surface forms — cabinets, tables, architectural masses.
- Extrude and inset for architectural details like window frames, baseboards, and crown molding.
- Arrays for repeated elements: fence posts, floorboards, slats, panel grids.
- Booleans for clean cutouts that would be painful to model manually.
- Subdivision Surface for soft, controlled curves on furniture and organic architectural details.
A practical modeling workflow I use
Here’s the step-by-step sequence I fall back on for most personal archviz projects. It’s simple, but it keeps me from overworking the mesh too early and ensures the asset holds up under different lighting conditions:
- Gather references and define the object’s purpose in the scene — hero, support, or background.
- Block out the main proportions with primitive shapes, using real-world dimensions whenever possible.
- Add symmetry and rough structure with modifiers, keeping everything non-destructive.
- Refine the silhouette and major planes against the hero camera angles.
- Add cutouts, bevels, and supporting geometry — still leaning on modifiers.
- Check shading under simple lighting (a neutral HDRI or a few area lights) to spot problems early.
- Clean up only the areas that are visible in the final frames.
- Apply modifiers only when the shape is absolutely stable and you’re ready to commit.
- Finish with material tests and quick render checks to confirm the asset reads correctly in context.
Troubleshooting common modeling problems
The model looks faceted.
Usually the bevels are too tight, smoothing is not controlled properly, or the normals need attention. In archviz, this often happens on walls or large flat surfaces that lack even a subtle edge break. A tiny bevel with a weighted normal modifier can fix it without adding heavy geometry.
The shape looks too soft.
The bevel may be too wide, or the control edges are too far from the corner. This is common when a Subdivision Surface modifier is applied without enough supporting geometry — the form loses its crispness and reads as mushy.
Booleans created shading issues.
Clean up the topology around the cut, add a few strategic edge loops, and check whether the operation was necessary in that form. Sometimes a simpler inset-extrude combination gives a cleaner result for recessed panels.
The object feels unrealistic.
Check the edge treatment. Real objects almost always have some rounding, even when they look sharp. Also verify that the scale matches real-world references — a common pitfall in archviz is a chair that’s 10% too large, which throws off the entire room’s believability.
The model is too heavy.
Reduce detail in hidden areas, simplify repeating elements, and avoid overbuilding background assets. In an interior scene, a high-poly bookshelf in the deep background is just wasting render time and memory.
Checklist before I call a model finished
- The silhouette reads clearly from all key camera angles.
- Scale feels believable against known references (door height, counter height, etc.).
- Edges catch light naturally — bevels are consistent and appropriate for the material.
- Modifiers are still editable if future changes are likely; if applied, a backup exists.
- Topology is clean where it matters (curved surfaces, hero areas).
- The asset fits the camera distance — detail density matches its visibility tier.
- The object looks good in basic lighting; no weird shading artifacts or faceting.
- No unnecessary geometry remains in hidden areas (backfaces, internal faces).
If an object passes this checklist, it’s ready for materials and final rendering. I’ve found that running through these points saves me from discovering problems late in the process, when fixes are costly.
Techniques I rely on the most
| Technique | Best for | Why it works |
|---|---|---|
| Blockout | Early proportion control | Fastest way to catch design problems before detail locks you in. |
| Mirror | Symmetrical objects | Speeds up modeling and keeps forms consistent; easy to break symmetry later. |
| Bevel | Realistic edge highlights | Makes surfaces respond to light naturally — essential for believable materials. |
| Boolean | Cutouts and openings | Efficient for complex subtractions; cleanup is manageable with practice. |
| Subdivision Surface | Smooth controlled forms | Useful when edges need to stay soft and organic, like furniture curves. |
| Array | Repetition | Great for panels, slats, floorboards, and any repeated architectural detail. |
Final thoughts
The modeling techniques I use most in personal Blender projects aren’t flashy, but they’re dependable. Block out first, stay non-destructive for as long as possible, use bevels to make surfaces believable, and only add detail where the camera will actually notice it. That’s the real difference between a model that just exists in the viewport and one that holds up under scrutiny in a finished render — whether it’s a sunlit interior, a moody twilight exterior, or a close-up detail shot. In archviz, where the goal is to sell an unbuilt space as real, these habits aren’t just nice to have; they’re the foundation of every image that convinces.
FAQ
What is the best Blender modeling technique for beginners?
Blockout with simple primitives is the best starting point because it teaches proportion before detail — a skill that translates directly to architectural visualization, where scale and spatial relationships make or break the image.
Should I always use non-destructive modeling?
Not always, but it’s the safest default for personal projects because it keeps options open. In archviz, where client feedback or your own design iterations can shift window sizes or furniture layouts, non-destructive workflows save hours of rework.
Are booleans bad for topology?
No. They’re incredibly useful, especially for architectural cutouts. The key is to clean up visible areas after the cut — a few well-placed edge loops and a normal check usually solve shading issues. Don’t avoid booleans; just learn to manage their aftermath.
How do I make hard-surface models look realistic?
Use believable bevels, control the highlights, and avoid mathematically perfect sharp edges. Even the crispest modern furniture has subtle edge treatment. Pair that with accurate scale and good material definition, and the model will read as real.
When should I apply modifiers?
Apply them only when the shape is stable and you no longer need easy edits. In a personal project, I often keep modifiers live until the very end, only applying them if I need to do manual topology cleanup or export to another application.