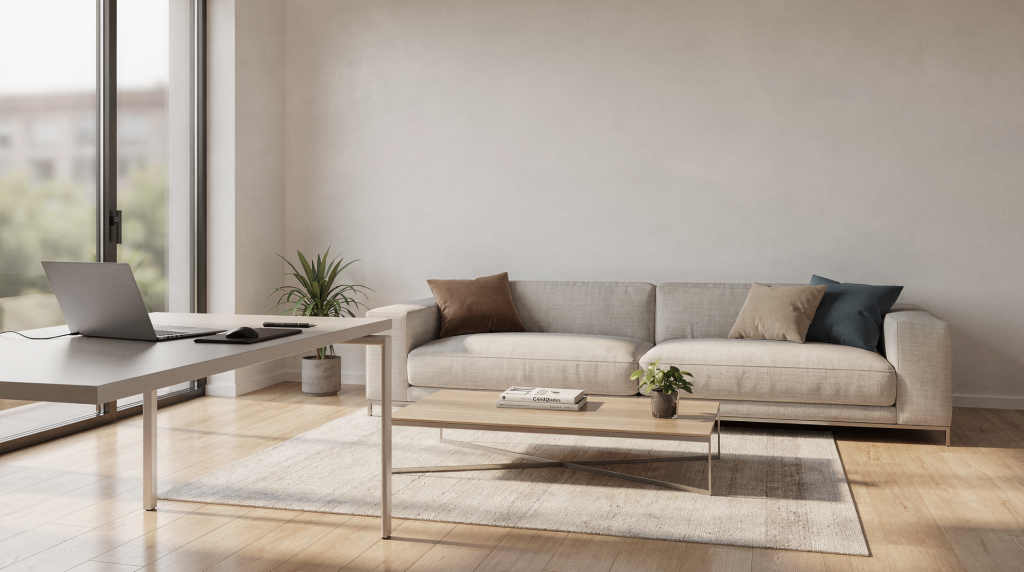
When I moved from general 3D art into interior visualization, the biggest change was not software — it was process. Shifting from character sculpts and fantasy environments to interior renders meant swapping invention for accuracy. A room has to feel believable at a glance, and every design decision gets measured against real-world scale, physical materials, and the behaviour of light.
Why interior visualization needs a different workflow
A character scene or fantasy set can absorb a fair amount of creative exaggeration. An interior cannot. Clients may not articulate it, but they instantly sense when proportions are off, when a material reads as plastic instead of painted wood, or when daylight doesn’t fall the way it should through a window. Trust evaporates in those moments.
That forced my workflow to evolve in four concrete directions:
- I started building from measured dimensions rather than from what “looked right” in the viewport.
- I treated reference images as hard production assets — not just inspiration boards — pinning down exact materials, joinery details, and lighting scenarios.
- I separated geometry, materials, lighting, and styling into distinct, sequentially verifiable stages.
- I inserted review checkpoints early enough so that mistakes were cheap to fix, not something to rescue in post.
If you’re after consistent results, the objective isn’t to sprint through each step. It’s to make every step easy to confirm, so you catch discrepancies before they compound.
The first shift: from artistic freedom to spatial accuracy
In general 3D art, pushing proportions can strengthen an image. In interior archviz, a 10% overscale sofa shrinks the perceived floor area; a window head set a few centimetres too high changes the light play across a marble floor; a camera angle that distorts verticals makes a ceiling feel oppressively low. These are subtle failures, but they’re exactly the sort clients pick up on.
I learned that spatial accuracy isn’t a limitation — it’s the safety net that lets the lighting and materials do the heavy lifting. When every surface sits at the right coordinate, the render engine’s physical calculations (GI bounces, Fresnel reflections, soft shadows) start behaving predictably. In Corona Renderer or V-Ray, a room modelled at 1:1 scale with correct wall thicknesses and opening sizes will naturally produce accurate light falloff and bounce colour, because the solver interprets the volume correctly.
What I changed in practice
- I pulled floor plans and elevations into the scene as underlays before modelling a single polygon, scaling them against a known dimension like an 850 mm door width.
- I modelled to scale from the start — system units set to millimetres or metres, and I periodically measured critical spans with a tape helper.
- I verified wall heights, ceiling steps, door frames, and sill levels in the wireframe stage, before investing time in chamfers and bevels.
- I stopped placing cameras until the architectural shell felt physically coherent, so the viewpoint would reveal the space rather than mask an error.
A habit that has saved me countless revisions is to ask one question at the project’s outset: what is the minimum set of dimensions I need for this room to feel physically credible? The answer usually includes more items than you’d guess — often floor-to-ceiling height, window and door schedules, corridor widths, and the depth of any alcove that might affect shadow casting.
My interior visualization workflow now
Here’s the core sequence I rely on for most interior commissions. Each step produces something you can check quickly, either in the viewport or with a low-sample preview render.
1. Collect the right inputs
A clean brief saves hours of backtracking. The most efficient projects land with: dimensioned floor plans, internal elevations or sections, site photos (if the space exists), material specifications and finish preferences, furniture and fixture lists, moodboards, and clarity on image usage and final aspect ratio. If the room is not yet built, I cross-reference plans, spec sheets, and visual references; any conflict gets resolved before a single wall is extruded. Often I’ll ask for a couple of hero material samples — a tile sample, a paint chip, a wood veneer swatch — because manufacturer PDFs rarely communicate roughness and colour accurately.
2. Block the shell in real scale
The shell comes first: walls, floors, ceilings, window openings, doors, and major built-ins. At this stage the scene looks bland, and that’s a good sign — it means I’m not decorating my way around a structural problem. I run quick sanity checks: Do circulation paths feel right? Does the ceiling height allow the light fixture I plan to use? Does a kitchen island sit at a comfortable distance from the cabinets (usually 1000–1200 mm clear)? I might drop in a simple placeholder human figure for scale comparison. The goal is not beauty but confidence that the architecture will support whatever composition comes later.
3. Set the camera before detailing too much
A common trap is fully dressing a room before committing to the final camera angle. In practice, the hero shot often reveals only 30% of the modelled space, so every unseen polygon is wasted effort. I prefer to place cameras once the shell is dimensionally solid, then refine framing around the story the room needs to tell. I’ll consider: What is the selling point of this space — the double-height volume, the kitchen island, the view? Which material or feature should pull the eye first? Does the chosen focal length (typically 24–35 mm for interiors) keep verticals straight or require a subtle camera correction? A strong interior image answers a design question, not just documents furniture. I often output a wireframe overlay from the camera to confirm proportions before moving on.
4. Build materials in layers
Materials do much of the emotional work. I break them into groups:
- Structural: walls, floors, ceilings
- Hard surfaces: stone, tile, glass, metal
- Soft materials: fabric, rugs, upholstery
- Accent finishes: wood veneer, painted trim, decorative plasters
Getting each material to look physically plausible on its own is only half the job. They also need to read correctly in relation to one another. A polished marble floor will bounce light up onto a matte wall differently than a satin paint would, and Fresnel reflections on a lacquered console will interact with the colour temperature of ambient light. In practice, I set up the core shaders using a PBR approach (base colour, roughness, normal, sometimes a subtle clearcoat) and test them in a neutral lighting rig early, so I’m not diagnosing material issues at the same time I’m balancing exposure and contrast.
5. Light the room before styling it fully
Light defines the mood long before the accessories do. My order of operations is: establish natural light (HDRI or physical sun+sky), check daylight direction and softness, then layer in artificial sources — ceiling fixtures, task lights, and accent illumination. With Corona’s LightMix or V-Ray’s LightSelect, I can balance contributions in the frame buffer without re-rendering, which saves enormous time when a client wants to compare a midday look with an evening setup. If the lighting isn’t compelling at this stage, no amount of decorative objects will rescue it; the scene will feel structurally flat. I’ve learned to push the light until the volumes read clearly in monochrome, only then moving to colour grading.
6. Add furniture and decor with restraint
Interior visualization isn’t about cramming every corner. The aim is a space that feels lived-in without compositional clutter. My placement sequence is: large casegoods and sofas → secondary seating and storage → rugs and curtains → lighting fixtures → decor → small lifestyle details like books or tabletop objects. The magic comes from the rhythm of spacing and scale — 50–70 mm gaps between a sofa arm and a side table read as intentional; less starts to look chaotic. Over-decorating is the fastest way to make a render look staged, so I keep asking: does this item support the story?
7. Check, then refine
I never wait until final pixels to catch problems. Preview renders happen throughout:
- After shell blocking — check proportions and camera.
- After base materials — catch surface breaks or tiling artefacts.
- After lighting — verify shadow softness, brightness ratios, and colour balance.
- After styling — scan for awkward furniture spacing, visual clutter, and reflection issues.
Region renders and A/B comparisons in the frame buffer make this quick. The earlier you catch a broken reflection or an over-bright lamp shade, the less post-production you’ll need later.
What changed in my software mindset
The tools themselves mattered less than the habits I built around them. Interior work forced me to use the same software more deliberately. For example, I started leveraging the render engine’s built-in colour management (ACES or Filmic tonemapping) earlier rather than relying on Photoshop to fix tonal balance.
| Area | Before | After |
|---|---|---|
| Scene setup | Built quickly from intuition | Built from measured references and plans, scaled to system units |
| Camera work | Chosen late, often after detailing | Chosen early and tested with simple blocking geometry |
| Materials | Treated as final polish | Developed and tested against neutral lighting during block-in |
| Lighting | Adjusted after styling | Established before detailed decor, with light mix balancing |
| Feedback | Collected near the end | Collected at defined checkpoints — shell, light, materials, styling |
This shift transformed my work from reactive to proactive. Instead of patching in post, I could make better creative decisions while the scene remained fluid, with only light processing overhead.
The biggest mistakes I had to unlearn
1. Modeling too much too early. Diving into detailed joinery before verifying the shot composition wastes modelling hours and makes revisions painful.
2. Ignoring real-world scale. Even a 2% dimensional drift can make a room feel synthetic — it’s often visible in the way shadows attach to walls or how fabrics drape.
3. Using too many reference images without hierarchy. I now separate design intent refs, material swatches, lighting examples, and styling moodboards into distinct collections. Mixing them confuses direction and leads to a “frankenstein” interior.
4. Overusing post-production. Compositing can enhance, but it shouldn’t carry weak fundamentals. If the base light, materials, and geometry are wrong, heavy colour grading only masks the problem temporarily.
5. Treating every project like a blank canvas. In archviz, the client’s specification and design intent are non-negotiable unless the brief explicitly opens creative freedom. My role is to execute and enhance, not redesign.
How I now organize a project from day one
Before a scene enters production, I run through a short checklist that eliminates ambiguity and aligns expectations.
Project setup checklist
- Confirm the primary goal of the image — is it a selling hero shot, a design review angle, or a progress preview?
- Gather plans, elevations, reference packages, and material specs; convert all to a single system-unit file.
- Identify any unresolved design questions (e.g., kitchen cabinet style, window glazing spec) and flag them upfront.
- Define the camera count and each view’s focal length range.
- Set output resolution, aspect ratio, and colour space.
- Agree on the target mood and time of day for lighting.
- List furniture and decor priorities, noting which items must match real products.
- Pinpoint materials that need to match a physical sample — e.g., a specific tile or wood species.
- Agree on revision stages: shell review, light and material review, final dressed render.
This simple setup prevents most downstream confusion. It also makes client feedback manageable because everyone works toward the same explicit target.
A simple interior workflow you can reuse
If you’re adapting your own process, here’s a consolidated starting sequence. The order matters as much as the steps themselves.
Step-by-step process
- Review the brief and gather source material; clean and scale imported CAD underlays.
- Build the room shell at correct scale — walls, openings, floor, ceiling — and verify critical dimensions.
- Place the camera and test composition; check verticals, focal length, and what falls within the view frustum.
- Add major architectural details and built-ins that impact the composition.
- Apply base materials, setting up PBR shaders and testing them with a neutral gray environment if needed.
- Set daylight (HDRI or sun) and artificial lighting; balance with LightMix until the mood reads correctly.
- Add furniture and style the space, filling from large items toward small accessories.
- Render previews and fix any structural or light-level issues.
- Refine materials, reflections, glossiness, and colour balance — often using region renders on problem areas.
- Produce final output and apply light post-processing: curves, glare, subtle vignette, and render element compositing if required.
When to spend time, and when to simplify
Not every interior requires the same level of fidelity. A marketing hero shot for a luxury penthouse deserves the full treatment: high-poly furniture, multi-layered material refinement, and carefully tuned light balance. A fast concept render for internal design review benefits from a lighter setup — perhaps fewer light bounces, simplified materials, and only the main camera resolved.
Spend your effort where it counts:
- The main camera view —matte painting or high-detail background if the window view is prominent.
- Hero surfaces — marble countertops, parquet flooring, or custom joinery that defines the space.
- The focal lighting zone — where highlights and shadows guide the viewer’s eye.
- Objects closest to the camera — these need proper displacement and crisp textures.
- Reflections and window views — what appears in mirrors and glazing directly influences perceived realism.
Simplify:
- Background elements outside the main frame or severely out of focus.
- Hidden corners and service areas.
- Decorative clutter that doesn’t support the design narrative.
- Areas that don’t affect the selling point — the ceiling of a utility room visible only through a cracked door, for instance.
A fluid workflow is partly about knowing where not to invest detail.
How interior visualization improved my portfolio
Specializing in archviz changed how I present my work entirely. A broad 3D portfolio can be impressive, but interior visualization needs its own reading order and context. For a site like Wark3D, it made sense to let architectural visualization become the primary focus while earlier generalist work moves into a secondary archive. This gives visitors a clear expectation: the site stands for interiors, exteriors, property renders, and the specific craft behind them.
A practical structure that emerged over time:
- Feature interior projects on the homepage — light-filled living rooms, kitchens, bedrooms, and the occasional exterior context shot.
- Build a dedicated Architectural Visualization category in the main navigation, so potential clients see a curated body of work immediately.
- Write case studies that unpack the process, not just a gallery of polished finals. Describe the design challenge, the reference package, and how lighting solved a particular spatial problem.
- Keep a smaller archive for older generalist work — sci-fi props, character sculpts — clearly labelled so it doesn’t dilute the archviz brand.
- Publish blog posts that share technique, workflow insights, and real project lessons, turning the site from a personal showcase into a resource.
That structure signals expertise and builds trust with architects, developers, and design studios who are looking for a reliable rendering partner.
Final thoughts
Adapting my workflow for interior visualization wasn’t about abandoning 3D art. It was about solving a more disciplined problem: making unbuilt spaces feel accurate, inviting, and genuinely ready to inhabit. The biggest lesson proved simple — in interiors, realism flows from restraint and rigour. Measure before modeling, block early, light deliberately, and style with purpose. When those foundations are solid, the final image stops being a battle and becomes a natural conclusion.
FAQ
What is the main difference between general 3D art and interior visualization?
Interior visualization imposes much stricter demands on real-world scale, architectural accuracy, and physically plausible lighting. Unlike character or fantasy scenes where creative exaggeration is expected, an interior render must convince the viewer that the space could exist exactly as shown — down to door heights, material reflectance, and how daylight distributes through a window reveal.
What should I gather before starting an interior render?
Ideally, collect dimensioned floor plans, internal elevations or sections, site photography, material specifications (finishes, colour references, swatches), a furniture and fixture schedule, and clarity about the image’s purpose — whether it’s a marketing hero, a design review draft, or a social media teaser. The more concrete the inputs, the less guessing happens later.
When should I choose the camera angle?
Choose the camera after blocking the room shell to scale, but before committing to detailed styling. This lets you frame the shot around the architecture’s strengths and avoid wasting detail on areas the camera will never see. It also helps catch proportion issues early — if a kitchen island looks cramped through the viewfinder, you can adjust the layout before adding faucets and bar stools.
Why do preview renders matter so much?
Preview renders expose proportion errors, composition flaws, lighting imbalances, and material misreads while the scene is still easy to adjust. Region-rendering a problematic corner takes seconds; correcting a fully dressed scene after final-quality rendering costs hours. Regular low-sample checks act as a built-in quality control loop.
How do I make an interior render feel more realistic?
Use precise scale, physically based materials with appropriate roughness and reflectance values, natural-looking light (often starting from an accurate HDRI), and restrained styling that leaves breathing room. Also pay attention to the “in-between” details: chamfered edges, subtle fabric folds, realistic window views, and correctly exposed highlights. Small inaccuracies become glaring in interior scenes because we all carry an innate sense of how a room should feel.